Do you maintain an old codebase that’s not testable? And you’re able to refactor it because there’s no test coverage?
This is a common challenge that many software development teams face, but there’s a way out. Solution is simple, but not easy.
We’ll explore a 5-step process to break the untestability cycle. You’ll get an instruction to improve you code quality by introducing unit tests. One step at a time.
You won’t find code examples. I’m discussing a process, not the implementation. My focus is on the methodology rather than on specific language or technology.
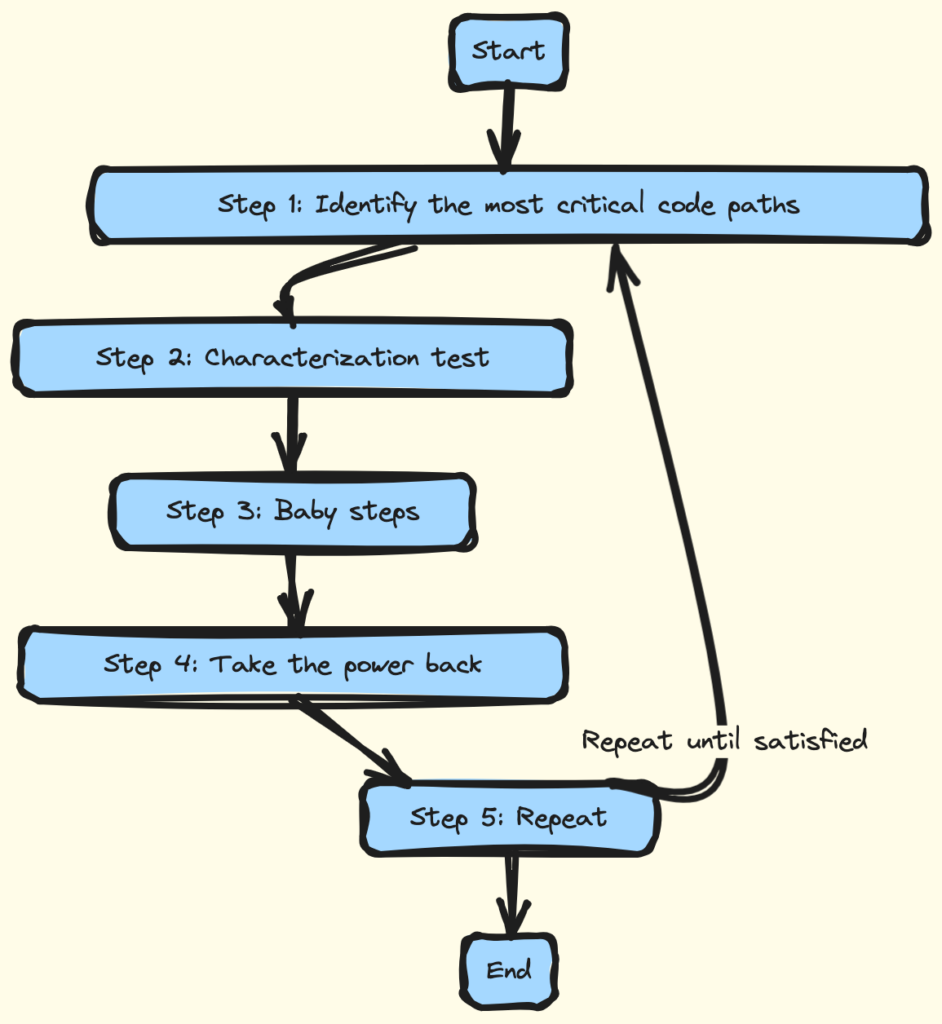
Step 1: Identify the most critical code paths
The first step is to identify the most critical code paths in your application. These are the parts of the code that are most important for the business logic and functionality of your application. Start by analyzing the use cases and user stories of your application to determine which code paths are most critical.

When faced with an old codebase that’s not testable, the first step to improving its quality is to pinpoint the danger zones. This means exploring the codebase to identify the high-risk elements that are most critical to the business logic and functionality of the application.
Start by analyzing the codebase to understand its architecture and design. Look for patterns and anti-patterns that can make the code difficult to maintain or modify. Consider the dependencies between different modules and components, and identify any areas that are particularly complex or tightly coupled.
Once you understand the codebase, focus on finding the code sections most prone to bugs and mistakes. These are the areas where changes are likely to introduce new problems.
By targeting these high-risk elements first, you can ensure that the refactoring process is focused on improving the most critical parts of the codebase. This can help to reduce the risk of introducing new bugs and errors, and ensure that the application remains stable and functional after refactoring.
Focus your initial refactoring efforts on these high-risk areas.
✅ select candidates for refactoring
Step 2: Characterization test
After identifying the high-risk elements in the codebase, the next step is to describe the existing flow. This means writing tests to capture the current behavior of the code, without making any changes to the production code.

Start by writing tests for the critical code paths identified in step 1. These tests should be designed to capture the existing behavior of the code, so that you can verify that the refactored code behaves in the same way. You may need to mock static or final dependencies to isolate the code under test and make it more testable.
Write as many tests as possible to ensure that you have good coverage of the critical code paths. This will help to ensure that you don’t introduce any regressions or new bugs during the refactoring process. It’s important to be thorough and capture all of the edge cases and potential failure scenarios.
This approach is called characterization testing. The goal of characterization testing is to capture the existing behavior of the code so that you can verify that the refactored code behaves in the same way. By using this approach, you can gain confidence that your refactored code is functionally equivalent to the original code and that you have not introduced any regressions or new bugs.
✅ write tests describing system as it is
Step 3: Baby steps
After describing the existing flow of the codebase through characterization testing, it’s time to make small changes to the production code. This is where you can start refactoring the code to make it more maintainable, testable, and performant.

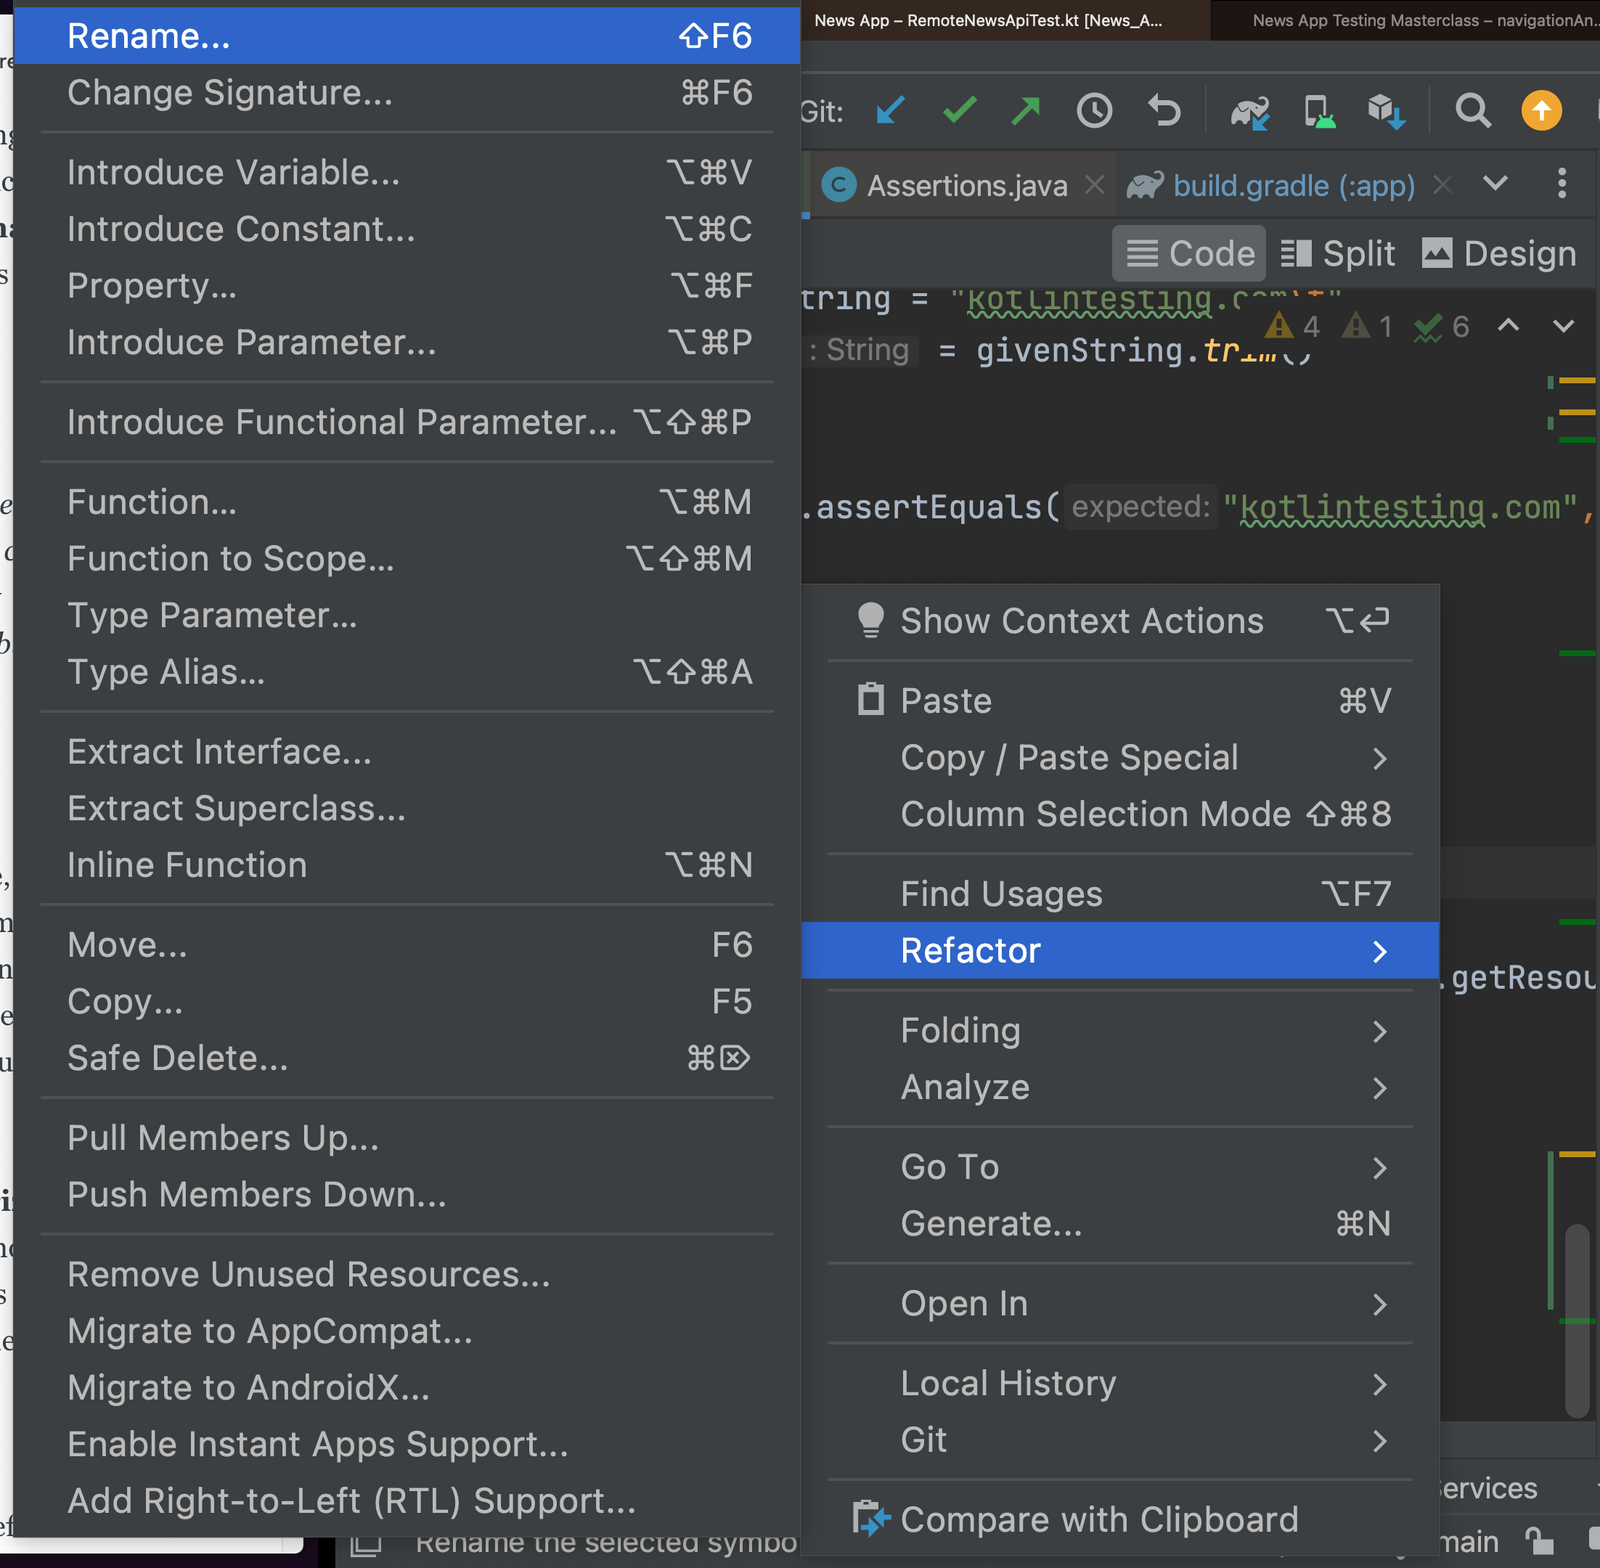
Start by making small changes to the codebase, such as renaming variables, extracting methods, simplifying code, and reducing complexity. Use the refactoring capabilities of your IDE to automate these changes and ensure that they are made consistently throughout the codebase.
As you make these changes, run the characterization tests to verify that the behavior of the code has not changed. This will help you catch any regressions or unintended consequences that may arise from the changes you’re making.
It’s important to make these changes in small increments and test each change thoroughly before moving on to the next one. This will help you catch any issues early and ensure that the refactoring process proceeds smoothly.
By making small changes and running tests at each step, you can gradually improve the quality and maintainability of your codebase without introducing new bugs or breaking existing functionality. This approach allows you to refactor with confidence and ensures that your application remains stable and functional throughout the process.
✅ make small improvements – introduce naming conventions, refactor code using only IDE tools
Step 4: Take the power back
After making small changes to the production code and running characterization tests, it’s time to take the power back by hiding implementation details behind abstractions. This means abstracting away any implementation details that are not necessary for the client to know, and providing interfaces or abstract classes that define the public API of your code.
Once you’ve identified the abstractions that you need, inject them into the target class using constructor injection or setter injection. This approach allows you to decouple your code and make it more testable, since you can now replace the implementation of the abstraction with a test double, such as a mock or stub.
Think about inversion of control when injecting dependencies into your code. This means inverting the control of the dependencies, so that the client class no longer creates or manages the dependencies directly, but instead relies on an external framework or container to manage the dependencies for it. This approach can make your code more modular, maintainable, and testable.
With implementation details hidden behind abstractions, you can now write proper unit tests for your code. These tests can be focused on testing the behavior of individual units of code in isolation from the rest of the system. This approach allows you to catch bugs and regressions early in the development process, and ensure that your code remains stable and functional throughout its lifecycle.
✅ introduce inversion of control & create isolated unit tests
Step 5: Repeat
The final step in the process of breaking the loop of having an old, untestable codebase is to repeat the process. This means continuing to identify high-risk areas, writing characterization tests, refactoring the code, running the tests, and writing unit tests.

The first characterization test is often the hardest part, since it requires a good understanding of the existing behavior of the code. However, once you have a good characterization test in place, the process becomes much easier.
By repeating this process regularly, you can gradually improve the quality, maintainability, and testability of your codebase over time. This can help to reduce the risk of introducing new bugs or breaking existing functionality, and ensure that your code remains stable and functional throughout its lifecycle.
Remember to focus on making small, incremental changes to the codebase, and to test each change thoroughly before moving on to the next one. This approach allows you to catch any issues early and ensure that the refactoring process proceeds smoothly.
Breaking the loop of having an old, untestable codebase can be challenging, but it’s not impossible. By following the 5-step process outlined in this article, you can gradually improve the quality and testability of your codebase, and ensure that your application remains stable and functional throughout its lifecycle.
✅ repeat until you’re satisfied